Celebrities like Kylie Minogue manage to have a perfect pout all the time, while rest of the people are cribbing about the liquid lipstick and how to make them stay. Wearing a lipstick is not as easy as it looks. It takes a lot of practice.
In this tutorial, we will show you how to make your lipstick lasts longer and not smudge it. It will take a little bit of your effort, time and practice. Let us have a look at how it’s done.
Step One: Prep Your Lip
The first and most important step is to prep your lips before applying lipstick to make them last longer. Apply the exfoliator to clear the dead cells then apply a balm. Give time to balm to settle on the lips. Then apply the primer and then the lipstick.
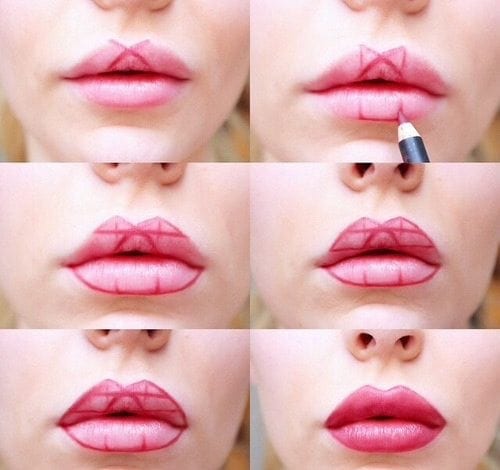
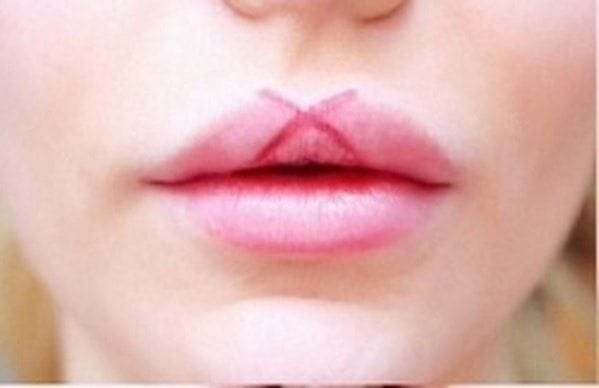
Step Two: Start Contouring
To fill the lipstick in an even manner on the lips draw these shapes on the cupid’s bpw and the lower lip and then outline the edges.
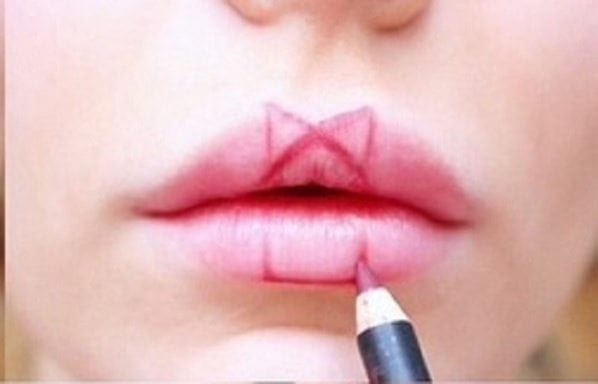
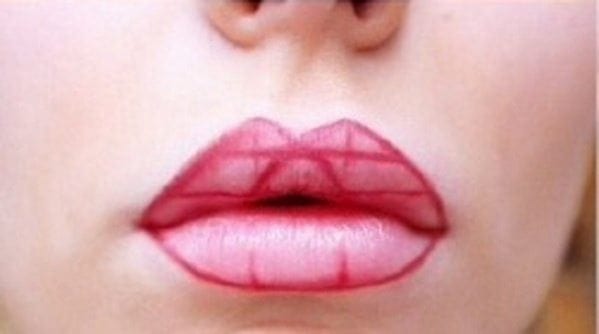
Step Three: Fill in the Borders
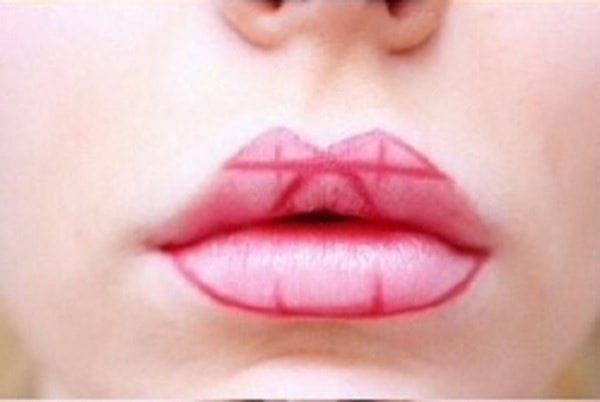
Like the method used for contouring, borders are to be filled in by drawing lines on the lips where they are fullest.
Step Four: Start Filling In

By covering as much of the lips as possible, the base is to be provided one which lipstick will be clinged on.
Step Five: Blend Liner Towards The Middle
Now the lines are to be blurred with a stiff brush so that they won’t be visible.
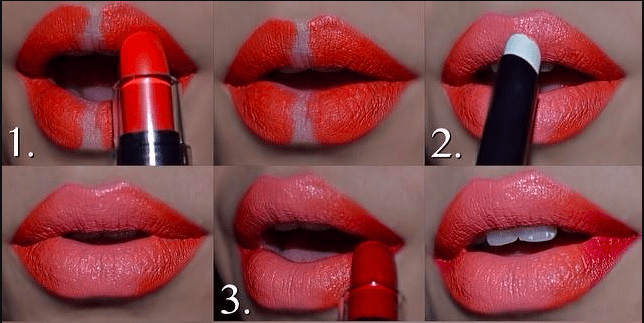
Step Six: Use Lipstick

Now blend the lipstick all over the lips so that they won’t smudge.
Here’s The Step By Step Chart For Reference
Get perfectly lined and colourful lips by following these simple tricks.